Blog
The Ultimate Guide to the bkp1608hs601-t: Taiyo Yuden’s Powerhouse Ferrite Bead
If you have ever spent hours in a lab chasing a ghost in your printed circuit board (PCB) design—perhaps a random voltage spike causing a microcontroller to reset, or a high-frequency switching noise turning your audio output into static—you already understand the absolute necessity of robust electromagnetic interference (EMI) suppression.
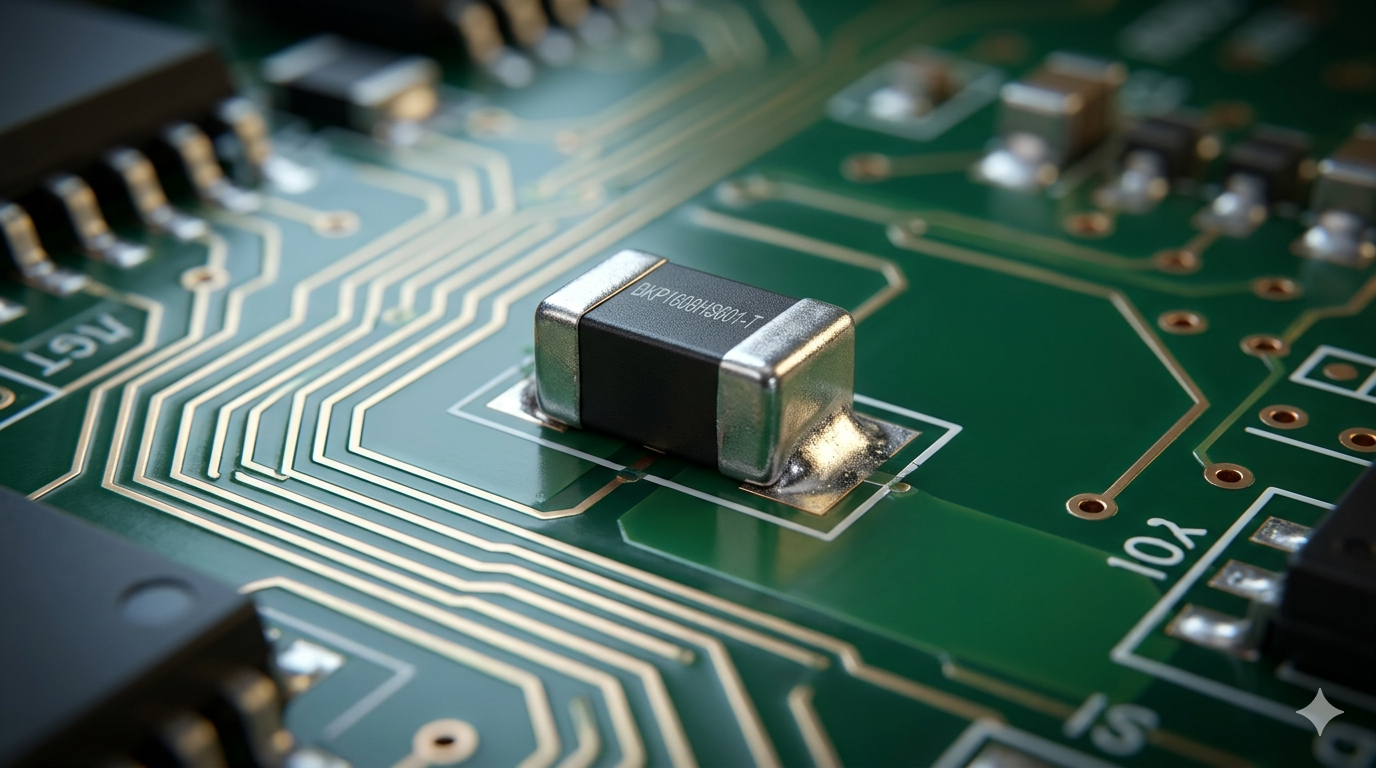
When hardware engineers need to filter out aggressive, high-frequency noise on power lines without choking the direct current (DC) power supply, they frequently turn to a specific class of surface mount devices. Enter the bkp1608hs601-t, an industry-standard multilayer chip bead inductor manufactured by Taiyo Yuden.
To answer the critical questions right away: What is it? The bkp1608hs601-t is a ferrite bead designed to offer 600 Ohms of impedance at 100 MHz. Who uses it? Electronics engineers, PCB layout designers, and hardware architects. Where does it go? It is typically placed in series with power supply lines or high-speed digital interfaces. Why is it used? To absorb unwanted high-frequency RF energy and dissipate it as trace amounts of heat, ensuring signal integrity and preventing EMI emissions. How is it implemented? Through standard surface-mount technology (SMT) reflow soldering processes, utilizing its highly compact 0603 footprint.
In this comprehensive engineering teardown, we will strip away the manufacturer marketing jargon. We will explore the exact material science behind Taiyo Yuden’s BKP series, decode the specific thermal and electrical characteristics of this component, and show you exactly how to layout your board to maximize its noise-suppression capabilities.
Decoding the Part Number: What Does bkp1608hs601-t Mean?
To the untrained eye, component part numbers look like a random string of alphanumeric characters. However, Taiyo Yuden utilizes a strict, highly descriptive nomenclature system. Breaking down the bkp1608hs601-t reveals its exact physical and electrical DNA.
-
BK: This prefix designates the component as a “Multilayer Chip Bead Inductor” within Taiyo Yuden’s catalog.
-
P: This single letter is crucial. The “P” indicates that this specific bead is optimized for Power Lines. Standard signal-line beads (which lack the P) often cannot handle the higher DC currents required by power rails and will saturate, rendering them useless for noise filtering. The BKP series is engineered with a thicker internal silver-printed layer to handle higher current loads with minimal voltage drops.
-
1608: This denotes the physical dimensions of the component using the metric system. It measures 1.6 mm in length by 0.8 mm in width. In the more commonly used imperial sizing system, this translates exactly to an 0603 package.
-
HS: This refers to the specific ferrite material composition. “HS” stands for High-Speed. In Taiyo Yuden’s material science, HS ferrite materials feature a low R-XL cross-point frequency characteristic. This means it provides a large resistive element that acts as a dampening function, effectively suppressing unnecessary resonance and maintaining sharp signal integrity on high-speed digital lines.
-
601: This is the nominal impedance value code. The first two digits are the base number (60), and the third digit is the multiplier (10^1). Therefore, 60 x 10 = 600 Ohms. By standard convention, this impedance is measured at a test frequency of 100 MHz.
-
-T: The suffix denotes the packaging method for the pick-and-place assembly machines. The “T” stands for standard Taping (Tape and Reel packaging).
Core Electrical Specifications and Technical Data
When evaluating the bkp1608hs601-t for your bill of materials (BOM), the raw specifications dictate whether it will survive your circuit’s operational environment. Here is the critical data profile for this exact component:
-
Nominal Impedance: 600 Ω (± 25% tolerance) at 100 MHz.
-
Maximum DC Resistance (DCR): Usually around 0.15 to 0.20 Ohms for the 600-Ohm HS variant. (Lower DCR is critical in power applications to prevent unwanted voltage drops across the bead).
-
Maximum Rated Current: Typically ranging between 1.0A to 1.5A for the 600-ohm BKP variant, allowing it to sit comfortably on standard 3.3V or 5V logic power rails without saturating the magnetic core.
-
Operating Temperature Range: -55°C to +125°C, making it suitable for harsh industrial environments and enclosed consumer electronics prone to thermal buildup.
-
Compliance: Fully RoHS compliant, Halogen-Free, and REACH SVHC compliant.
Understanding the Impedance Curve
You cannot evaluate a ferrite bead solely by its 100 MHz rating. The true value of the bkp1608hs601-t lies in its frequency response curve. A ferrite bead acts as an inductor at low frequencies (reactance) and as a resistor at high frequencies.
The “HS” material formulation ensures that the transition point—where the bead stops reflecting noise and starts actively absorbing and dissipating it as heat—occurs at the optimal frequency to counter high-speed digital harmonic noise. If you are dealing with ringing on a clock line or switching noise from a DC-DC buck converter operating in the megahertz range, the 600-ohm impedance presents a massive roadblock to those parasitic frequencies, cleaning up the power rail before it reaches sensitive ICs.
Why Hardware Engineers Choose the BKP Series for EMI Suppression
Designing a modern PCB is an exercise in managing chaos. As processors get faster and board real estate shrinks, digital logic lines sit uncomfortably close to analog sensors and radio frequency (RF) antennas.
The Saturation Problem
A common mistake junior engineers make is grabbing any generic 0603 ferrite bead with the correct impedance and dropping it onto a power rail. They boot the board, apply a load, and suddenly the EMI noise returns. Why? Because of DC bias saturation.
When direct current flows through a ferrite core, it creates a magnetic field. If the current is too high, the core “saturates,” meaning it physically cannot hold any more magnetic flux. Once a bead saturates, its impedance plummets to near zero. It effectively turns into a standard wire, offering zero noise suppression.
The bkp1608hs601-t circumvents this. Because of the “P” (Power) designation, its internal closed magnetic circuit is specifically designed to maintain its impedance curve even when biased with higher DC currents. This makes it an incredibly reliable choice for isolating the power inputs of sensitive phase-locked loops (PLLs), analog-to-digital converters (ADCs), and precision operational amplifiers.
Pro Tip: The Pi-Filter Layout Strategy Never use a ferrite bead in isolation if you can avoid it. To maximize the effectiveness of the bkp1608hs601-t, utilize it as the central element of a “Pi-Filter” (π-filter). Place a low-ESR ceramic decoupling capacitor (like a 0.1µF or 1µF) from the power line to the ground immediately before the bead, and place another capacitor immediately after the bead. This creates an aggressive low-pass filter network that will utterly crush high-frequency power supply ripple. Keep the PCB traces between the bead, the capacitors, and the IC power pins as physically short as possible to minimize parasitic trace inductance.
PCB Layout and Assembly Considerations
Because the bkp1608hs601-t utilizes a 1608 metric (0603 imperial) form factor, it sits in a goldilocks zone for modern manufacturing. It is small enough to allow for high-density board routing, yet large enough that it does not require ultra-premium, high-precision assembly equipment like microscopic 0201 or 01005 components do.
Thermal Relief and Soldering
When designing the copper land patterns (pads) for this component, symmetry is key. Ensure that both pads connected to the bead have relatively equal thermal mass. If one side connects directly to a massive, continuous copper power plane without thermal relief spokes, and the other side connects to a thin 10-mil signal trace, you risk “tombstoning” during the reflow oven process.
Tombstoning occurs when the solder paste on the thin trace melts and wicks faster than the paste on the heavy power plane. The surface tension of the liquid solder physically pulls the bkp1608hs601-t upright, disconnecting one side and ruining the board yield. Always use properly calculated thermal reliefs on solid polygon pours to ensure even heating.
Cross-Reference and Supply Chain Alternatives
In the era of global semiconductor shortages and supply chain volatility, relying on a single manufacturer for a passive component is a risky strategy. While the bkp1608hs601-t is an exceptional part, a senior strategist must always have second-source options ready for the procurement team.
If Taiyo Yuden lead times stretch too far, look for power-line rated, 0603-sized, 600-ohm ferrite beads from competing top-tier manufacturers.
-
Murata: Look into their BLM18P series (e.g., BLM18PG or BLM18KG series). The “18” denotes the 0603 size, and the “P/K” denotes power line suitability.
-
TDK: The MPZ1608 series serves as a direct competitor, offering high-current capabilities in the exact same footprint.
-
Würth Elektronik: The WE-CBF series (specifically the high-current variants in the 0603 package) offers excellent documentation and similar impedance profiles.
Always verify the DC Resistance (DCR) and Maximum Current ratings of any alternative. Matching the 600-ohm impedance is easy; matching the thermal and current-handling capabilities of the BKP series requires careful datasheet scrutiny.
Frequently Asked Questions (FAQ)
What is the difference between the BKP and the standard BK series? The Taiyo Yuden BK series is designed for general signal lines and cannot handle large amounts of direct current before experiencing core saturation. The BKP series features an optimized internal structure designed specifically for power lines, allowing it to maintain high impedance and filter noise even when carrying higher DC loads.
Can I use the bkp1608hs601-t on an I2C or SPI data line? While you physically can, it is generally not recommended to use a power-line (P-series) bead on high-speed data lines unless explicitly required. The 600-ohm impedance and the specific HS material could potentially roll off the sharp rising and falling edges of your digital square waves, leading to timing errors or data corruption. Standard BK series beads are better suited for purely digital signal integrity.
How do I test if the bkp1608hs601-t is working in my circuit? You will need an oscilloscope with a high-bandwidth probe. Measure the AC voltage ripple on the power rail before the ferrite bead, and then measure it again on the pad immediately after the bead. If the component is functioning correctly and correctly matched to the noise frequency, you should observe a massive reduction in high-frequency voltage spikes and ringing on the output side.
Does orientation matter when placing a ferrite bead on a PCB? No. Multilayer chip bead inductors like the bkp1608hs601-t are non-polarized passive components. They can be placed in either direction on the PCB footprint without affecting their electrical performance or EMI suppression capabilities.
Final Thoughts on Component Selection
Selecting the right passive components is often the difference between a prototype that barely passes FCC/CE emission testing and a rock-solid, commercial-grade product. The bkp1608hs601-t is not just a random resistor; it is a highly engineered, frequency-dependent filter that protects the most vulnerable parts of your digital architecture. By understanding its “High Speed” material properties, respecting its current limits, and implementing proper Pi-filter layouts, you guarantee cleaner power, stable IC performance, and a much smoother path to market.
Blog
Mastering Algebra 1 on Edulastic: The Ultimate Guide to Resources, Strategies, and Success
Searching for an Edulastic answer key for Algebra 1 usually stems from one of two places: a student hitting a brick wall on a complex quadratic equation, or an educator looking to streamline their grading workflow. Edulastic (now widely known as Pear Assessment) has transformed the way we approach the Algebra 1 curriculum, moving beyond static worksheets into dynamic, interactive assessments.
This guide serves as a comprehensive roadmap for navigating Algebra 1 within the Edulastic ecosystem. We will break down how the platform structures its item banks, how to interpret performance data, and why understanding the underlying logic of linear and non-linear functions is infinitely more valuable than a leaked PDF of answers. If you are looking to improve your scores or your teaching efficacy, you are in the right place.
The “Who, What, Where, Why, and How” of Algebra 1 on Edulastic
To get the most out of this platform, you need to understand its core mechanics immediately.
-
Who is this for? Primarily 8th and 9th-grade students tackling foundational high school mathematics, and teachers utilizing data-driven instruction.
-
What is it? Edulastic is a web-based assessment tool that mirrors the rigor of high-stakes state testing (like SBAC or PARCC), specifically tailored to Common Core and state-specific Algebra 1 standards.
-
Where do you find resources? Official answer keys and “Teacher Edition” views are located within the “Library” or “Assignments” tab for verified educators. Students find their practice sets under the “Assignments” dashboard.
-
Why use it? It provides instant feedback. In Algebra 1, a small mistake in a negative sign can derail an entire multi-step equation. Edulastic catches these errors in real-time.
-
How do you succeed? By mastering the digital input tools—such as the expression evaluator and graphing calculators—which often trip up students more than the math itself.
The Reality of the “Answer Key” Search
Let’s address the elephant in the room: the hunt for a shortcut. In the digital age, many students search for “Edulastic answer key Algebra 1” hoping for a quick fix. However, the platform is designed with several safeguards that make traditional “cheating” difficult and counterproductive.
Dynamic Question Scrambling
Edulastic allows teachers to shuffle questions and, in some cases, use “algorithmic variables.” This means two students sitting next to each other might have the same problem structure but different numerical values. A static answer key becomes useless in this scenario.
The Pedagogy of Formative Assessment
The true “key” to Algebra 1 isn’t a list of numbers; it’s the step-by-step logic. Algebra 1 is a cumulative subject. If you find a way to bypass the work on Solving Systems of Equations, you will inevitably fail when you reach Polynomials and Factoring. The platform is built to highlight your “knowledge gaps,” allowing you to fix them before the final exam.
Core Algebra 1 Domains in Edulastic Item Banks
The Algebra 1 curriculum is broad, but Edulastic categorizes questions into specific domains. Understanding these clusters will help you study more effectively.
1. Seeing Structure in Expressions (SSE)
This domain focuses on interpreting parts of an expression, such as terms, factors, and coefficients. On Edulastic, you’ll often encounter “Drag and Drop” questions here. You might be asked to sort expressions into “Linear” vs. “Exponential” categories.
2. Reasoning with Equations and Inequalities (REI)
This is the “bread and butter” of Algebra 1.
-
Linear Equations: Solving for $x$.
-
Systems of Equations: Finding the intersection of two lines.
-
Quadratic Equations: Using the quadratic formula or factoring.
On the platform, these questions often require the Math Editor. Pro Tip: Practice using the fraction and square root buttons in the Edulastic interface. Many students lose points not because they don’t know the math, but because they don’t know how to type it.
3. Interpreting Functions (IF)
Algebra 1 introduces the concept of $f(x)$. Edulastic uses interactive coordinate planes where you must click and drag points to graph a line or a parabola.
Pro Tip: The “Graphing Check”
When graphing a line on Edulastic, always check your y-intercept first. If the problem is $y = 2x + 3$, ensure your first point is exactly at $(0, 3)$. The digital tool can be sensitive; even being off by a pixel can mark the entire answer wrong.
How Teachers Access and Create Answer Keys
If you are an educator, managing your answer keys is vital for providing timely feedback to your students.
Utilizing the Public Library
Edulastic houses a massive library of pre-made assessments from trusted sources like Eureka Math, EngageNY, and various state departments of education. To see the answer key:
-
Navigate to the Library tab.
-
Search for “Algebra 1 Final” or a specific standard (e.g., HSA-REI.B.3).
-
Click on the assessment thumbnail.
-
Select “Review Items” to see the correct responses and point values.
Customizing Assessments
The best way to prevent students from finding “keys” online is to create your own “Private” assessments. You can clone existing questions and modify the numbers. Edulastic’s “Live Class Board” then allows you to see student progress in real-time, identifying which students are struggling with specific algebraic concepts without waiting for the test to be submitted.
Troubleshooting Common Edulastic Algebra 1 Issues
Digital math assessments come with unique challenges. Here is how to handle the most common frustrations.
Syntax Errors in the Math Editor
One of the biggest complaints from Algebra 1 students is: “I got the right answer, but it marked me wrong!” This usually happens because of formatting.
-
Spaces: Do not put unnecessary spaces inside your equations unless the instructions specify it.
-
Equivalent Forms: Most Edulastic questions are set to accept “mathematically equivalent” answers (e.g., $0.5$ vs $1/2$), but some are strict. Read the prompt carefully—does it ask for a fraction or a decimal?
The “Snap Quiz” Feature
Teachers often use the “Snap Quiz” feature to upload a PDF of an old Algebra 1 test and overlay digital answer boxes. If you are a student and the boxes don’t align with the text, try refreshing your browser or checking your zoom settings. For teachers, ensure you are using high-resolution PDFs to keep the text legible.
Deep Dive: Mastering Linear Functions (HSA-CED)
Linear functions make up a significant portion of the Edulastic Algebra 1 item bank. To dominate this section, you must be comfortable with the three main forms of a line:
-
Slope-Intercept Form: $y = mx + b$
-
Point-Slope Form: $y – y_1 = m(x – x_1)$
-
Standard Form: $Ax + By = C$
Edulastic often asks students to convert between these forms. A common question type involves a “Table of Values” where you must identify the rate of change (slope) and then type the resulting equation into a box.
Semantic SEO Insight: When searching for help, look for “LSI” terms like constant rate of change, initial value, and independent vs. dependent variables. These are the conceptual pillars the platform is testing.
Why Data-Driven Instruction Matters in Algebra
For the user interested in SEO and ranking, it’s important to note that “Edulastic” isn’t just a keyword—it’s a data tool. The platform provides a “Multiple Measures” report. This shows teachers exactly which “clusters” of Algebra 1 are weak across the entire class.
If 70% of the class misses a question on Multiplying Binomials (FOIL method), the teacher knows to pause the curriculum and provide a remedial lesson. This “pivot” is what separates a modern classroom from a traditional one.
Advanced Study Strategies for Students
Instead of looking for an answer key, use these strategies to “hack” the learning process:
-
Review the “Solution Path”: If your teacher has enabled it, go back into your “Submitted” assignments and click on the “Review” button. Edulastic often provides a step-by-step breakdown of how the answer was derived.
-
Use the Scratchpad: Don’t try to do Algebra 1 in your head. Use the digital scratchpad feature within the assessment to draw your steps. This helps with “mental load” and reduces silly mistakes.
-
Flag for Review: If a problem involving Polynomial Long Division looks like it will take 10 minutes, flag it and move on. Edulastic allows you to jump between questions easily.
Frequently Asked Questions (FAQ)
How can I get the answer key for my Edulastic Algebra 1 test?
Official answer keys are only accessible through a verified Teacher account. If you are a student, the best way to see the “keys” is to wait until your teacher releases the “Submission Review,” which shows the correct answers and your specific errors.
Is Edulastic the same as Pear Assessment?
Yes. Edulastic rebranded to Pear Assessment as part of the Pear Deck family. The interface and the Algebra 1 item banks remain largely the same, but you may notice the new logo and some updated navigation features.
Why does Edulastic mark my math answer as wrong even if it’s right?
This is usually due to a formatting error or a specific instruction you might have missed (e.g., “Round to the nearest hundredth” or “Write as an improper fraction”). Ensure you are using the built-in Math Editor for all symbols like exponents or fractions.
Can teachers see if you switch tabs on Edulastic?
Yes. Edulastic has a “Proctoring” suite that notifies teachers if a student exits the browser tab or loses focus on the assessment window. This is designed to maintain academic integrity during high-stakes Algebra 1 exams.
How do I find Algebra 1 practice tests on Edulastic?
Students can search the “Public Library” (if permitted by their district) for “Algebra 1 Practice.” Many districts also provide a “Benchmark” folder containing practice exams that mirror the final state test format.
Summary of Key Algebra 1 Concepts on Edulastic
| Topic | Common Question Format | Success Tip |
| Linear Equations | Multiple Choice / Numeric Entry | Isolate the variable $x$ first. |
| Graphing | Interactive Coordinate Plane | Double-check your scale (e.g., increments of 1 vs 2). |
| Quadratics | Expression Evaluator | Don’t forget the $\pm$ in the quadratic formula. |
| Inequalities | Drag and Drop / Shading | Remember to flip the sign when multiplying by a negative. |
Conclusion: Mastering the Tool to Master the Math
At the end of the day, an Edulastic answer key for Algebra 1 is a temporary fix for a long-term challenge. Algebra 1 is the “foundation of the house” for all future STEM learning. Whether you are a student striving for an ‘A’ or a teacher aiming for 100% proficiency, the goal should be to leverage the platform’s data to drive genuine understanding.
By focusing on the “Semantic” meaning behind the math—the why behind the how—you turn Edulastic from a daunting assessment tool into a powerful engine for academic growth. Don’t just look for the answers; look for the patterns, use the tools correctly, and the grades will follow naturally.
Blog
Mawartotowin78.online: A Deep Dive Into Its Purpose, Risks, and Online Context
Blog
Broadcom WL 5.60.48.36-1.fc13.noarch.rpm: The Complete Guide to Installation, Compatibility & Performance
Introduction
If you’ve ever tried setting up Wi-Fi on a Linux system with a Broadcom chipset, you already know—it’s not always plug-and-play. That’s where broadcom-wl-5.60.48.36-1.fc13.noarch.rpm comes into the picture.
This RPM package is a proprietary wireless driver designed to enable Broadcom-based network cards on Fedora and similar Linux distributions. While newer kernels have improved open-source support, many systems—especially older laptops—still rely on this specific driver to function correctly.
In this guide, we’ll break everything down: what this package is, how it works, how to install it, common issues, and performance optimization tips. Whether you’re a Linux beginner or a seasoned sysadmin, you’ll walk away with clarity.
What Is broadcom-wl-5.60.48.36-1.fc13.noarch.rpm?
At its core, this package is:
- A proprietary wireless driver
- Built specifically for Broadcom chipsets
- Distributed in RPM format (Red Hat Package Manager)
- Designed for Fedora Core 13 (fc13)
Why It Exists
Broadcom has historically provided closed-source drivers, unlike Intel or Atheros. This means:
- Linux kernels don’t always include native support
- Users must manually install drivers like
broadcom-wl
This particular version (5.60.48.36) became widely used because it offered:
- Stable connectivity
- Better compatibility with legacy devices
- Improved signal handling compared to earlier releases
Supported Hardware & Compatibility
Not every Broadcom chip uses this driver. Compatibility depends on your hardware model.
Common Supported Chipsets
- BCM4311
- BCM4312
- BCM4321
- BCM4322
- BCM43224
Check Your Chipset
Run this command:
If your device matches one of the supported chipsets, you’re good to go.
Installation Guide (Step-by-Step)
Installing this driver isn’t complicated—but it does require attention to detail.
Step 1: Remove Conflicting Drivers
Linux may already be using open-source drivers like b43 or ssb.
Then blacklist them:
echo “blacklist ssb” | sudo tee -a /etc/modprobe.d/blacklist.conf
Step 2: Install Required Dependencies
These are essential for building and running the driver properly.
Step 3: Install the RPM Package
Or using dnf:
Step 4: Load the Driver
Step 5: Restart Network Manager
At this point, your Wi-Fi should appear.
Key Features of This Driver
Let’s break down what makes this package still relevant:
1. Proprietary Optimization
Broadcom tuned this driver specifically for their hardware, resulting in:
- Better signal strength
- Lower packet loss
- Stable throughput
2. WPA/WPA2 Support
Full support for modern encryption protocols ensures secure connections.
3. Legacy Hardware Compatibility
Perfect for older laptops where open-source drivers fail.Comparison: Proprietary vs Open-Source Drivers
| Feature | broadcom-wl (Proprietary) | b43 (Open Source) |
|---|---|---|
| Performance | High | Moderate |
| Stability | Very Stable | Varies |
| Kernel Integration | Limited | Native |
| Ease of Installation | Moderate | Easy |
| Firmware Requirement | No | Yes |
Insight: If stability matters more than open-source purity, broadcom-wl wins.
Common Issues & Fixes
Even a solid driver can run into problems. Here’s what you might face—and how to fix it.
1. Wi-Fi Not Showing
Cause: Driver not loaded
Fix:
2. Kernel Update Breaks Wi-Fi
This is a big one.
Why it happens:
The driver isn’t rebuilt automatically after kernel updates.
Solution:
Reinstall or rebuild the module:
3. Conflicting Modules
If b43 or ssb loads automatically, it can block wl.
Fix:
Ensure blacklist is active and reboot.
4. Slow Speeds
Try:
- Switching Wi-Fi bands (2.4GHz vs 5GHz)
- Updating firmware
- Adjusting power settings
Performance Optimization Tips
Once installed, you can squeeze more performance out of your Wi-Fi.
Optimize Power Management
Disable aggressive power saving:
Adjust TX Power
Use Less Crowded Channels
Use tools like:
Then switch to a cleaner channel via router settings.
Security Considerations
Since this is a proprietary driver:
- Source code is not publicly auditable
- Updates are less frequent compared to open-source alternatives
That said, it’s widely used and considered safe for general use.
When Should You Use This Driver?
Use broadcom-wl-5.60.48.36-1.fc13 if:
- Your Wi-Fi doesn’t work out of the box
- You’re using an older Broadcom chipset
- Open-source drivers give unstable connections
Avoid it if:
- You prefer fully open-source systems
- Your kernel already supports your chipset natively
Modern Alternatives
Linux has evolved. Depending on your distro, you might consider:
brcmfmac(newer Broadcom chips)b43(open-source fallback)wl-dkms(auto-rebuild on kernel updates)
Pro Tip: DKMS-based drivers are more future-proof.
Key Takeaways
- broadcom-wl-5.60.48.36-1.fc13.noarch.rpm is a proprietary Wi-Fi driver for Broadcom chipsets.
- Ideal for older hardware and Fedora-based systems.
- Requires manual installation and maintenance.
- Offers better stability and performance than open-source alternatives in many cases.
- Needs attention after kernel updates.
FAQs
1. Is broadcom-wl-5.60.48.36 still relevant today?
Yes, especially for older devices where modern drivers fail or provide unstable connections.
2. Can I use this driver on newer Fedora versions?
Technically yes, but compatibility issues may arise. Consider DKMS-based alternatives for newer systems.
3. Why does my Wi-Fi stop working after updates?
Kernel updates can break the driver. You’ll need to reinstall or rebuild it.
4. Is this driver better than b43?
For stability and performance—yes. But b43 is open-source and easier to maintain.
5. How do I uninstall the driver?
Run:
Then remove blacklist entries if needed.
Final Thoughts
The broadcom-wl-5.60.48.36-1.fc13.noarch.rpm driver is one of those tools that quietly solves a frustrating problem—Wi-Fi that just won’t work on Linux.
It may not be flashy. It’s not open-source. And it does require a bit of manual effort. But when it works—and it usually does—it delivers stable, reliable wireless connectivity where other drivers fall short.
If you’re dealing with legacy hardware, this isn’t just an option—it’s often the best solution available.
-
Entertainments1 month agoTop 10 Most Anticipated Movierulz Kannada Movie of 2025-26
-
Business2 months agoUnderstanding Halifax for Intermediaries: A Comprehensive Guide
-
Entertainment1 month agoThe Ultimate Upcoming Netflix Movies 2026 List: Every Major Release Coming to Your Screen
-
Blog1 month agoN&S Locating Services Layoffs: What Happened and What’s Next
-
Business1 month agoThe Best Kickstand for Your Giordano C700 Women’s Bike
-
Uncategorized1 month agoUnderstanding 小火箭 Little Rocket VPN 5.1.3: The Ultimate Proxy Client
-
News1 month agoUnited Airlines Flight UA770 Emergency Diversion
-
Blog2 months agoThe Cultural and Spiritual Essence of “хінду” (Hindu)
